🎵 What is OpenLightShow?
OpenLightShow is a powerful Python-based audio-reactive lightshow controller that turns your music into mesmerizing visual effects. Originally designed for projector shows, it's perfect for parties, events, DJ sets, or creative visual performances.
📦 Installation
🚀 Easy Install (Recommended)
Windows Users
Download the standalone EXE installer from the GitHub Releases page. No Python installation required!
Python Users (All Platforms)
Install directly from PyPI:
# Install from PyPI
pip install openlightshow

# Run the application
openlightshow
💻 Development Install
For developers who want to modify the source code:
# Clone the repository
git clone https://github.com/digidigital/openlightshow.git
cd openlightshow

# Create virtual environment (recommended)
python -m venv venv

# Activate virtual environment
# On Linux/Mac:
source venv/bin/activate
# On Windows:
venv\Scripts\activate

# Install in development mode
pip install -e .

# Run the application
openlightshow
📋 Prerequisites
- Windows: Use the EXE installer (no prerequisites needed)
- Linux/Mac/Python install:
- Python 3.9 or higher
- pip (Python package manager)
📦 Dependencies
Automatically installed with the package:
- PySide6 - Qt framework for GUI
- numpy - Numerical computing
- librosa - Audio analysis and beat detection
- soundfile - Audio file I/O
🎮 First Run
- Launch OpenLightShow (via installer shortcut,
openlightshowcommand, or development run) - Click "Add MP3" to add your music files
- Select effects from the list (check the boxes)
- Adjust weights to control effect frequency
- Choose a preset or customize settings
- Hit "Play" and enjoy the show!
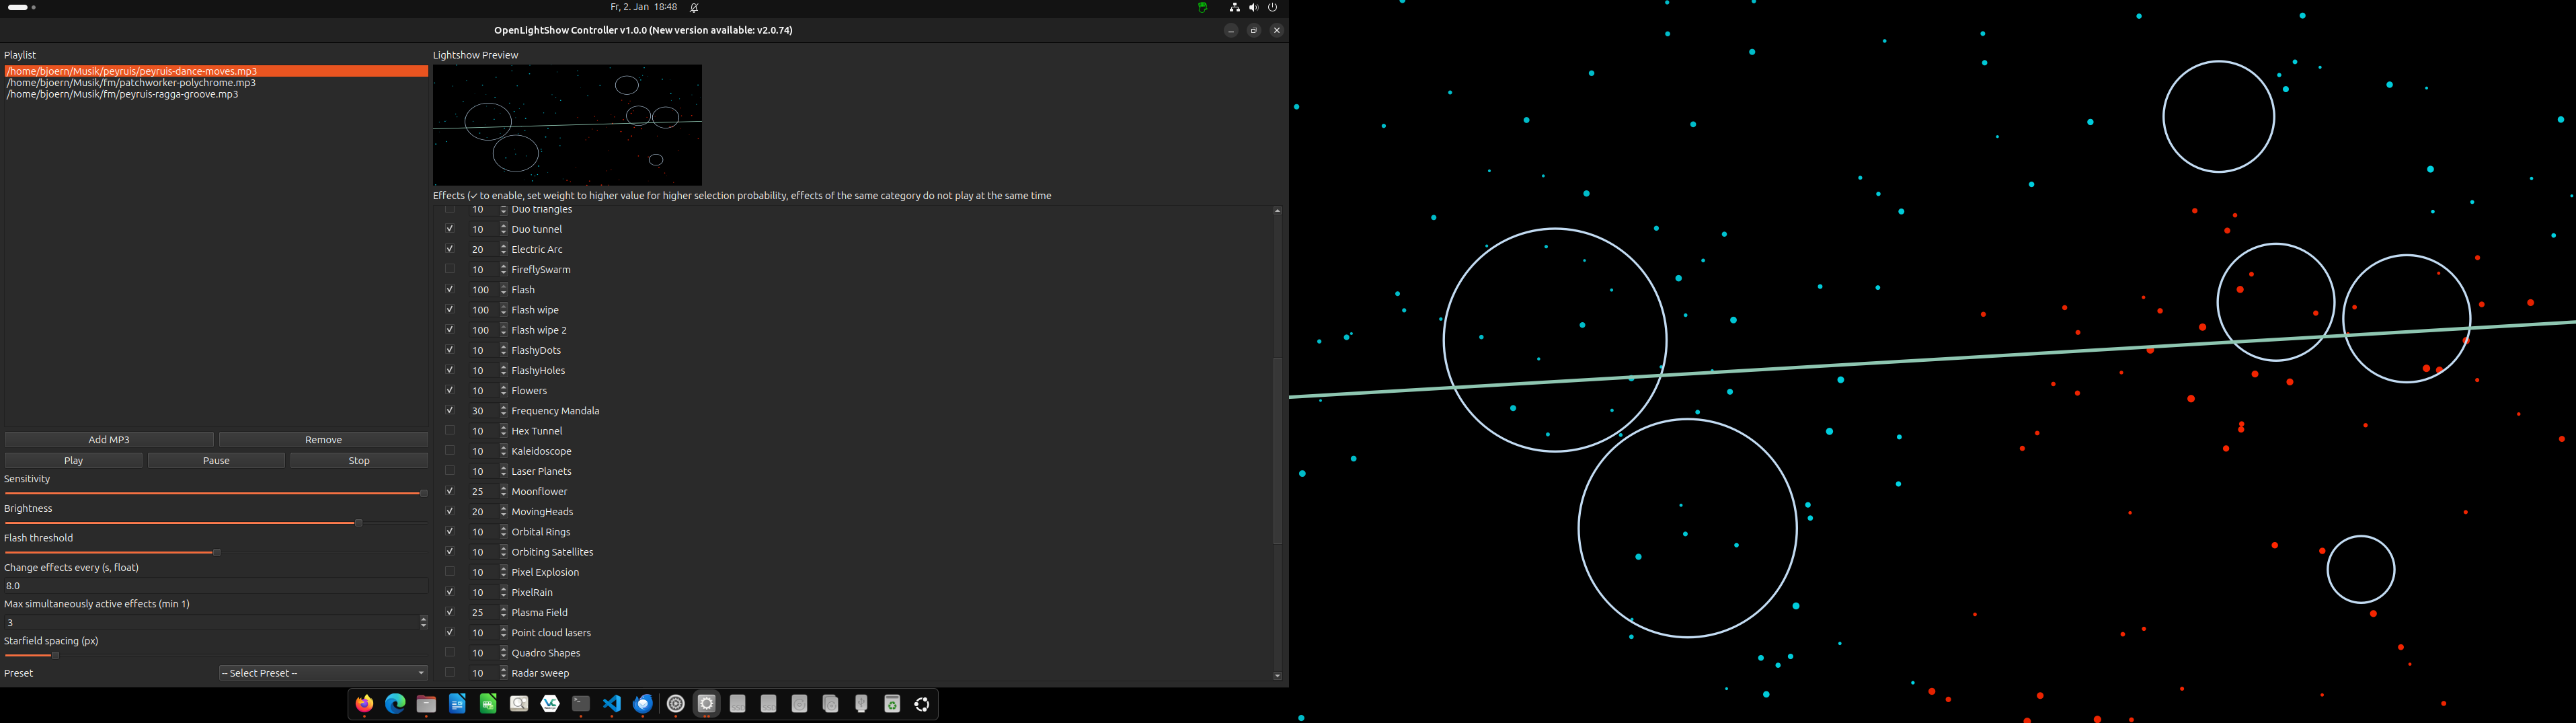
🎮 Usage Guide
Main Controls
- Playlist - Add/remove MP3/WAV files
- Transport Controls - Play, Pause/Resume, Stop
- Sensitivity - How reactive effects are to audio (0-100)
- Brightness - Overall brightness (10-200)
- Flash Threshold - Minimum energy for flash effects (50-100)
- Effect Period - How often effects change (seconds)
- Max Active - Number of simultaneous effects (1-10)
- Starfield Spacing - Spacing for starfield effect (20-200px)
Effects Panel
The effects panel shows all available effects with:
- Enable Checkbox - Check to include in random rotation
- Weight - Higher weights = more frequent selection (0-100)
- Effect Name - Descriptive name of the effect
Presets
Use the preset dropdown to quickly load pre-configured settings:
- All - All effects enabled with default weights
- Classic Disco - Disco balls, derby lights, moving heads
- Lasershow - Scanner lines, tunnels, geometric patterns
- Rave - High-energy strobes, flashes, and fast effects
- Mix - Balanced variety of effect types
- Particles - Particle systems and explosions
- Flashes - Strobe and flash effects only
Keyboard Shortcuts
- Space - Play/Pause
- Esc - Close fullscreen lightshow (if on primary screen)
👨💻 Developer Guide
Project Structure
openlightshow/
├── src/
│   └── openlightshow/
│       ├── main.py              # Main application
│       ├── effect_base.py       # Base effect class
│       ├── effect_loader.py     # Auto-discovery system
│       ├── presets.toml         # Preset configurations
│       ├── exclude_list.toml    # Effect conflict rules
│       ├── icons/               # Application icons
│       └── effects/             # Effect modules (58+ effects)
│           ├── beat_strobe.py
│           ├── disco_derby.py
│           ├── starfield.py
│           └── ...
├── pyproject.toml               # Package configuration
└── README.md                    # Documentation
Architecture
- Effect System - Plugin-based architecture with auto-discovery
- Audio Analysis - Beat detection and frequency band energy tracking
- Lightshow Widget - QPainter-based rendering on separate window
- Preview Widget - Real-time miniature preview in control panel
- Settings Persistence - QSettings for auto-save/load
- Preset System - TOML-based configuration files
Creating Custom Effects
All effects inherit from the Effect base class and are automatically discovered by the loader. Copy the prompt below and paste it into your AI assistant with your effect idea!
Effect Base Class Reference
The base class is included in the AI prompt above for easy copy-paste!
class Effect:
    """Base class for all lightshow effects."""
    name: str = "Effect Name"
    effect_class: str = "unique_class"

    def __init__(self, size: QSize):
        self.size = size
        # Initialize your effect state here

    def resize(self, size: QSize):
        self.size = size
        # Recalculate positions/sizes

    def update(self, dt_ms: int, energies: dict,
               sensitivity: float, flash_thresh: float):
        # energies: {'low': 0.0-1.0, 'mid': 0.0-1.0, 'high': 0.0-1.0}
        # Update animation state

    def paint(self, painter: QPainter, brightness: float):
        # Draw your effect using QPainter

    def on_beat(self):
        # Optional: triggered on detected beats
Contributing
- Fork the repository
- Create a feature branch:
git checkout -b feature/amazing-effect - Create your effect in
src/openlightshow/effects/ - Test it in the application
- Commit your changes:
git commit -m 'Add amazing effect' - Push to the branch:
git push origin feature/amazing-effect - Submit a pull request
Development Tips
- Use numpy for efficient array operations
- Cache expensive calculations in
resize() - Keep
paint()fast - it runs at 60 FPS - Use
effect_classto group similar effects (prevents conflicts) - Test with different audio types (bass-heavy, vocal, instrumental)
- Check the
exclude_list.tomlif effects shouldn't play together
⚙️ Configuration Files
presets.toml
Define custom presets with effect selections and weights:
["My Custom Preset"]
sensitivity = 80
brightness = 120
flash_threshold = 85
effect_period = 12.0
star_spacing = 50
max_active = 3
effects = [
    "Effect Name 1",
    "Effect Name 2",
    "Effect Name 3"
]

["My Custom Preset".effect_weights]
"Effect Name 1" = 50
"Effect Name 2" = 30
"Effect Name 3" = 20
exclude_list.toml
Define groups of effects that shouldn't play together:
my_conflict_group = [
    "Effect A",
    "Effect B",
    "Effect C"
]
✨ Key Features
- Real-time audio analysis using librosa beat detection and frequency band extraction
- 58+ built-in effects including scanners, strobes, particles, tunnels, and more
- Smart effect rotation with weighted random selection and conflict prevention
- Dual-screen support - control panel on primary, fullscreen output on secondary
- Live preview widget - see effects in real-time without switching screens
- Preset system with customizable TOML configurations
- Exclude list to prevent conflicting effects from playing together
- Persistent settings - all UI state auto-saved and restored
- Effect weights - control selection probability per effect
- Plugin architecture - effects auto-discovered, easy to add new ones
- Beat-reactive - effects respond to music beats and energy
- Customizable parameters - sensitivity, brightness, flash threshold, rotation speed
📄 License & Credits
OpenLightShow License
OpenLightShow is released under the MIT License.
View Full License Text | Project Homepage
Third-Party Licenses
OpenLightShow is built using the following open-source libraries. We gratefully acknowledge their contributions:
Core Framework
Audio Processing
-
librosa - Audio and music analysis library
License: ISC License
Homepage | License -
soundfile - Audio file I/O based on libsndfile
License: BSD 3-Clause License
Homepage | License
Scientific Computing
-
NumPy - Fundamental package for scientific computing
License: BSD 3-Clause License
Homepage | License -
SciPy - Scientific computing and technical computing
License: BSD 3-Clause License
Homepage | License -
scikit-learn - Machine learning library (used by librosa)
License: BSD 3-Clause License
Homepage | License
Additional Dependencies
License Compatibility
All third-party libraries used in OpenLightShow are licensed under permissive open-source licenses (MIT, BSD, ISC, LGPL) that are compatible with OpenLightShow's MIT license. These licenses allow:
- ✅ Commercial use
- ✅ Modification and distribution
- ✅ Private use
- ✅ Patent use (where applicable)
Acknowledgments
We are grateful to the open-source community and the developers of these excellent libraries. Without their work, OpenLightShow would not be possible.